
Overcoming Your DIY Fears
Have you been staring at that battered coffee table covered in scratches and stains, and wondering what you should do with it? Or do you have a piece of furniture that you wished was a different colour? Throw or give away and replace would probably be the quickest and easiest way to fix this situation. Then you recall a conversation with a friend about her wonderfully satisfying upcycling project with Chalk Paint®…

Starting on your DIY journey is exciting, but it can also be slightly daunting. It’s like doing anything new for the first time, a million questions run through your mind - what if the colour I chose to paint my coffee table doesn’t look great? Can that be fixed? What if I take something apart and don't know how to put it back together again? What if I get stuck in the middle of the project and ruin my precious vintage trunk? This happens to everyone and it’s part of any creative process. When we flip through pages of beautifully painted and styled spaces in magazines, they usually don’t tell us about the oopsy daisies, the late nights and wine spills but trust us, that’s all part of the fun!
AND, that’s what we’re here for! We’re sharing some advice, and tips and tricks to help you overcome your DIY fears.

First things first, especially when starting out on something new - start small. Yes in this case, size does matter. Give yourself the time and space to experiment before starting on that bigger piece of furniture, maybe start with a small stool, a chair or a wooden crate. Tackling your first project, you’ll gain familiarity with a tool or two, how the paint works and will be able to build your skills from there. If you’re planning to paint something bigger like a cabinet or bookcase, remember that you can also start with the back of the piece to test out the colour and to get familiar with the brush or roller. Once you’re satisfied with the colour and have the technique down, it’s time to paint! Useful tip - Paint in a well-lit area. It’s the only way you’ll be able to see if spots are missed.
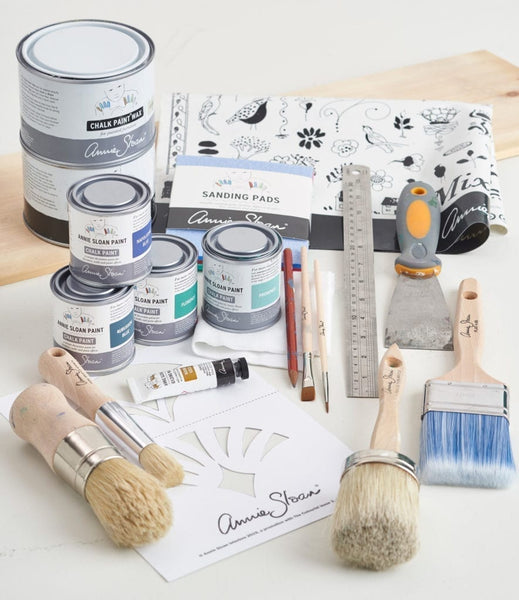
Tools matter! Let’s be honest, cheap brushes don’t always end up giving you the best finish. The right tools make a world of difference. Like Annie always says, if you’re unhappy with the way the paint has turned out, it’s not the paint, it’s the brush! Much like makeup or any other art form, the right kind of brushes make a world of difference.
Use Annie Sloan Natural Bristle brushes for carved surfaces or a painterly finish and Annie Sloan Flat Flat Brushes or Rollers for a smooth finish. You will thank yourself for investing in the right tools once your project is finished and looks amazing! Useful tip - we always recommend two coats of paint rather than one thick coat. First coats are usually patchy, the second coat will even out the finish. And always watch out for drips on corners or edges!
Lost screws or handles can be a nightmare. Whenever you’re taking something apart, such as hardware like handles, knobs and screws, make sure you have your phone handy and take a bunch of pictures so you’ll know how many pieces you have and how it all goes back together, step by step. In projects like these, your camera is your best friend! Labeling helps too, especially in situations where you have many bits and pieces of the same thing.
Never skimp on preparation! It saves you time and effort at the end of the project. Wipe your piece with a damp cloth and take off all the dust before you paint. If you need to mask off a section of your furniture that you don’t want to paint, take the time to apply the masking tape neatly right along the edges so that when you take it off you get clean lines and no bleeding. Protect or remove hardware if you don’t plan to paint it. And have your paint, water, tools and some happy music set up before you start!
So now you’ve upcycled your furniture with Chalk Paint®, and as you look at it you realize that you don’t quite like the colour or it doesn’t fit in the space like you thought it would. Don’t panic! You can always decide to modify or repaint the piece (yes!), even after you’ve applied Chalk Paint® Wax or Lacquer. Let it sit for a day or two before you make that decision… and if you do decide you’d like to redo it, we’re always here to help.

Think of why you decided to start on this DIY journey… Was it to save your furniture from ending up in the dump? Or maybe you wanted a creative outlet? Did you perhaps want to experience something new or create some memories with the little ones? We’re not going to lie and tell you that DIY is always easy. Everyone makes mistakes at some point during a project, yes even us - but in the end it’s always worth it. The process is always meditative and fun! Reimagining a piece of furniture or decor, using a whole set of products to create something beautiful, playing with colour and techniques, and being able to finish your project in a few hours and look at it proudly - that experience is priceless! And if you need a confidence boost, tackle your first project with a friend. A can of Chalk Paint®, a bottle of wine and your favorite tunes - you can help each other and laugh through the experience as you figure it out.
The hardest part of anything is starting. But once you start on your DIY journey with us, it’ll be hard to stop!
Shop your DIY supplies at www.bigbluetrunk.sg or visit us at 02-14 Cluny Court